
QUICK & EASY
Straight forward
And FAST
NICE SITE. EASY TO SEARCH.
EXCELLENT
EXCELLENT!
THANKS!
Fairly easy to order what we needed, THANK YOU!
GOOD SO FAR.
WONDERFUL!
NICE WEBSITE. EASY TO NAVIGATE AND FIND PRODUCTS
WAS FAST AND EASY
SHOPPING WENT WELL WITHADEQUATE INFO
VERY PLESANT. Courteous and Professional.
GREAT DISPLAY VERY EASY TO FOLLOW THX
I search the internet for companies who sold batteries for my laptop. I found laptopbatteriesexpress.com
And very quickly found the replacement battery I needed. I ordered my battery and received it in a week.
I had some issues with installing the new battery but after talking with the tech at laptopbatteriesexpress.com and doing what he suggested, my problem was solved. My battery would not charge and it was a software issue on my laptop. Once I fixed that, the battery is now working great.
The extended life batteries I received for my thinkpad X61 tablet worked well. Unfortunately since I have a base for the tablet the extended life will not work with the thinkpad base. Laptopbatteriesexpress agreed to exchange the batteries for Lenovo brand batteries. Thx Jim
So far sooooooooogooooooooododdddd thank you for been so helpfull.have a great voting day
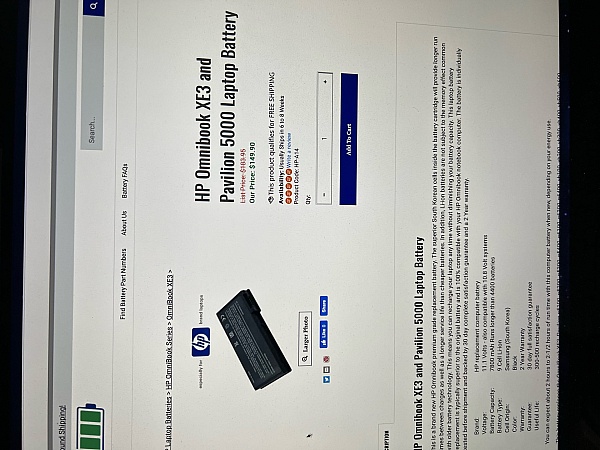
Well laid out website, with detailed info about exactly which laptop models each battery will fit in.
Good Lenovo X1 replacement battery, great price, TOUGH install, need video help for THIS model.
Bought two batteries... one for wife's Dell, one for my 6-year-old Lenovo X1 (an earlier and very different version than the X1 Carbon). If you are considering replacing this battery yourself, know that it is not simple. The Dell battery snaps on and off externally without unscrewing anything or going inside the laptop. The Lenovo... not so much. First step, don't look for X1 internal battery replacement YouTube videos, there are none (there are lots for the X1 Carbon). Second, don't assume that the X1 Carbon must be nearly the same as the X1; it is not, and the X1 battery replacement is much more involved.
The X1 Battery is internally located under the keyboard. To replace the X1 battery:
1) Download the ThinkPad Hardware Maintenance Manual at https://thinkpads.com/support/hmm/hmm_pdf/x1_x1hybrid_hmm_en_0a*******_05.pdf The images can be helpful. Zoom to 200-300% to get a good view if needed.
2) Start by going to page 73 of the above manual for removal and replacement steps for the Battery Pack. But wait, the battery pack can't be removed without first removing the bezel; and the bezel doesn't come out until the keyboard is removed... and before that the hard drive... and before THAT the battery must be disabled in BIOS. Bottom line, *four* remove/replace steps must be completed first before you can remove and replace the battery.
WARNING: before you take ANY of these steps I strongly suggest you take pictures at the start and end of each step of the process. Everything you are removing to get to the battery will need to be reversed to reassemble the laptop after the battery is replaced. Also pay attention to the length of the screws you are removing; there are screws of two different lengths. Be sure you know which screws came from which place, in each step, so you can put them back in the right place. The steps required to get to the battery are (using the numbering in the manual) are as follows:
1000 Disabling the battery pack in the UEFI BIOS (done using the keyboard, no disassembly). This step is as written in the manual.
1010 Hard disk drive and solid state drive removal (1 screw from the bottom of the laptop). This step is also as written in the manual. However after you remove the hard drive cover from the side of the laptop, you should also remove the now visible screw from the bottom of the unit in the middle of the opening for the hard drive. This is one of 13 screws that hold the bezel to the base of the laptop. More later.
1020 Keyboard removal (2 screws from the bottom of the laptop). There is more to this than the manual says. Yes there are 2 screws. After they are removed from the bottom of the machine, turn it upright and slide the keyboard as far towards the screen as you can, then CAREFULLY pry up the keyboard from the spacebar/control keys end of the keyboard. Once unseated, slowly tip the top of the keyboard towards you 180 degrees. The keyboard will be upside down and you should now see two ribbon cables connecting the keyboard to the motherboard. These must be disconnected. Another missing detail is that the black tabs that are part of the ribbon cable connectors (there are two) which connect the keyboard to the motherboard need to be flipped up 90 degrees to remove the ribbon cables. TUGGING ON THE RIBBON CABLES IS NOT HOW YOU REMOVE THEM. It seems the manual author presumed that you know this. (This is one place where watching some of the many X1 Carbon videos may help; the steps are 'different' but the videos WILL show you generally how to do things like removing ribbon cables from their connectors, all be it on a different machine. Still helpful though if like me you have never done this before.) Be very careful that you understand exactly how the ribbon cables are inserted so that you can replace them correctly when you are reassembling... You've been warned.
1090 Keyboard bezel assembly with fingerprint reader and audio sub card removal (10 screws from the bottom of the laptop, 2 more from the inside where the keyboard used to be) This too is an incomplete set of instructions. Yes you must remove the 10 screws shown from the bottom. But in addition, the bezel WILL NOT LIFT UP/COME OFF without removing three MORE screws from the bottom of the machine. These three are not shown in step 1090 in the manual. They are 1) the screw I referenced earlier in the '1010 Hard Disk Drive' removal process and 2) the two screws in the farthest corners of the base of the laptop, at the back of the machine where the screen hinges are. These two screws are set down into recessed rectangular openings. Once you have done this the bezel STILL cannot be removed (actually you don't need to remove it completely; it is still connected to the motherboard by wires); THEN as shown in the manual remove two more screws from the topside which screw the bezel into the motherboard. I found it easiest to simply flip it up and lean it against the display with the display positioned at the same viewing angle you would normally use when operating it. Before you can flip up the bezel you need to unsnap three wires with push on connectors (black, grey, white) connected to a chip on the motherboard. This is also NOT documented in the manual. TAKE A PICTURE so you remember which wires go where 30 minutes later! LAST Warning for the bezel removal... Steps 4&5 and steps 6&7 in 1090 involve removing two more ribbon cables from their connectors. Steps 6&7 uses the same kind of 90-degree flip up connector hinge as those in '1020 Keyboard Removal'. HOWEVER be warned, steps 4&5 require removal of a white plastic cap that holds a very small ribbon cable in its connector. Once you remove it the ribbon pops out and it becomes impossible to easily see how it had previously been inserted. Study this carefully before removing the cap and take close-up pictures before removing. You will be glad you did.
1100 Battery pack (2 screws from inside the top of the machine) Gently pry the battery connector off by slowly prying each end a little at a time until it disconnects.
OK I have been at this long enough. Good luck reading backwards, and reversing all these steps to correctly reassemble the laptop.
FINAL WARNING: once you insert the new battery, and reinstall the bezel THE POWER BUTTON WILL TURN ON THE LAPTOP IF YOU ACCIDENTALLY PUSH IT LIKE I DID (doh!). At this point you will have no keyboard installed, and no hard drive installed, and no way to turn off the machine (pushing and holding the power button doesn't work without a booted machine). You will have to remove the bezel again and then disconnect the battery, then start reassembling all over... Suggestion: tape something solid over the power button when you first remove the bezel so you don't accidentally power on the half assembled laptop. Most replacement batteries ship nearly fully charged.
Overview
LaptopBatteryExpress has a rating of 4.8 stars from 4,714 reviews, indicating that most customers are generally satisfied with their purchases. Reviewers satisfied with LaptopBatteryExpress most frequently mention great service, free shipping and timely manner. LaptopBatteryExpress ranks 98th among Laptop Batteries sites.
Instant Feedback
- Visit Website
- Grafton, OH, United States
- Edit business info
Company Representative

- Sitejabber’s sole mission is to increase online transparency for buyers and businesses
- Sitejabber has helped over 200M buyers make better purchasing decisions online
- Suspicious reviews are flagged by our algorithms, moderators, and community members


- Sitejabber’s sole mission is to increase online transparency for buyers and businesses
- Sitejabber has helped over 200M buyers make better purchasing decisions online
- Suspicious reviews are flagged by our algorithms, moderators, and community members